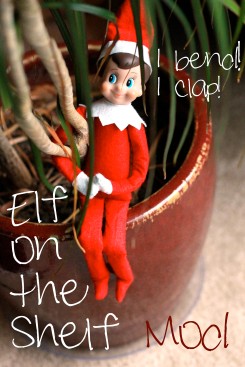
 I was so excited to run out and get “Elf on the Shelf” this year, I knew McKenzie would love it. At $29.99 it was a little overpriced if you ask me…but I figured we will use it for several years, so I considered it an investment. We named him Edwin “Eddie” the Elf.
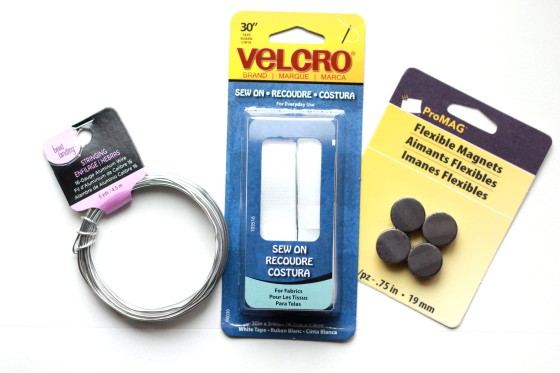
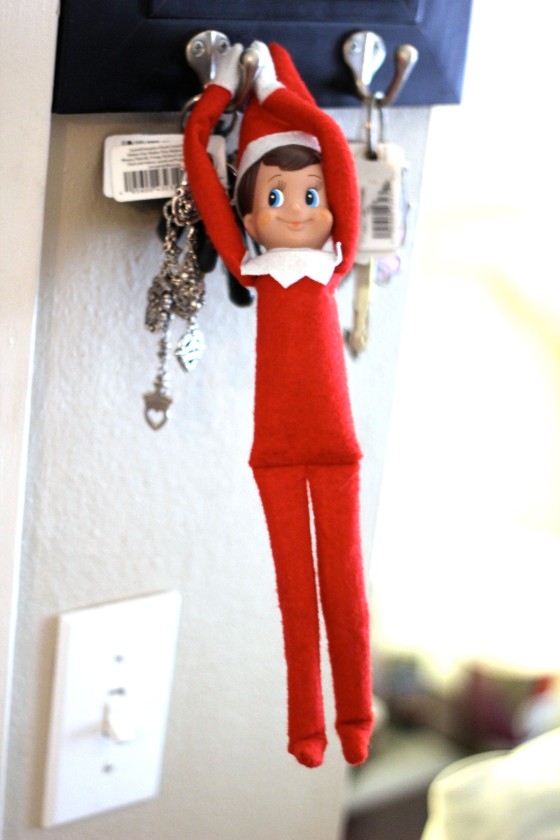
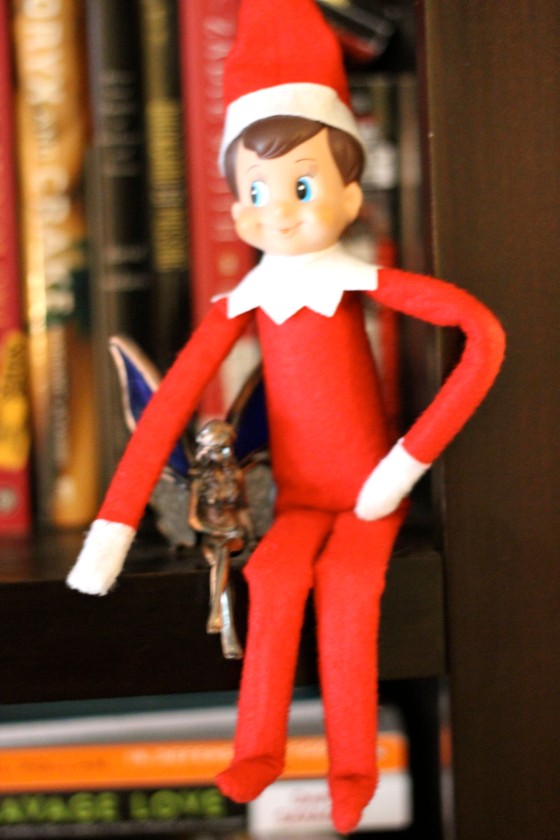
Initially, I was a little surprised that he wasn’t more pose-able…he kept falling off the shelves I would put him on, so I googled a quick solution: Elf on the Shelf Hack. You simply add some wires, velcro, and magnets! I ran to Michael’s craft store and bought the supplies right away. After the modifications, he can now bend, hang, and climb to his heart’s desire! And I even gave him little feet, ’cause I though he looked a little weird with stick legs. Anyhow…
You’ll need:
- White velcro
- 16 gauge wire (I found it at Michael’s in the bead aisle)
- Magnets
- Needle & white/red thread
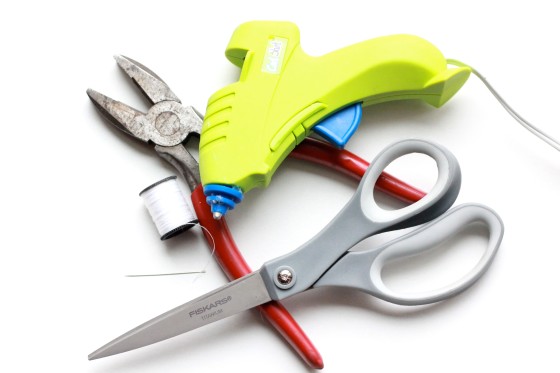
- Glue gun
- Scissors
- Pliers/wire cutter
- Stitch ripper (I don’t have one, so I used a pin to pull out the stitches, then a scissors to cut them free)
Steps:
- Step 1: First, snip the thread connecting the hands. Then, gently rip 2 stitches from the end of your Elf’s hands…or enough to fit the wire. This was pretty easy and I didn’t have any issues. Start heating your glue gun for the velcro in Step 5.
- Step 2: Measure the wire to the size of his arm, adding about an inch so you can curl the wire ends over (you don’t want it to poke through!). Then measure another piece of equally sized wire and wind them together. This makes him/her stronger.
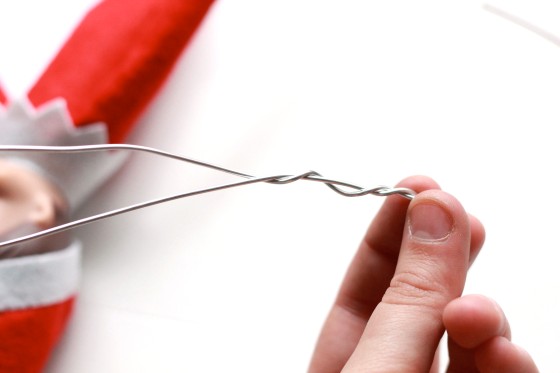
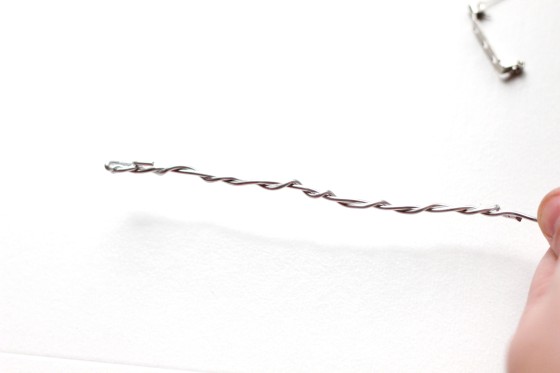
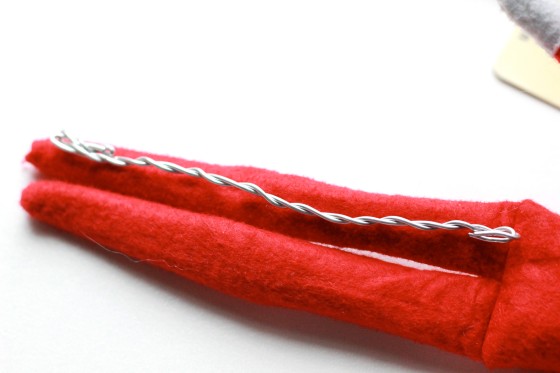
- Step 3: Fold the ends of the wire to the exact length of the arms, and insert the wire into your Elf’s arm. Be sure to get it all the way to the end. There are circular tubes in the arm…try to get the wire to go through them. It was tricky, but I managed after persistent wiggling. Then sew him up! (Be sure to use matching thread, and use whatever stitch you think looks best.)
- Step 4: Repeat steps 1-3 with other arm & then the legs.

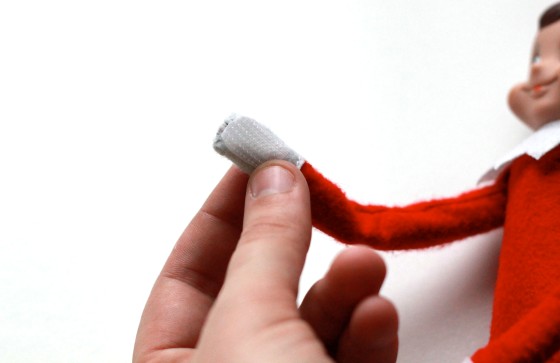
- Step 5: Next, you will add velcro to the bottom sides of your Elf’s hands. First, cut the pieces to size and use your glue gun to secure the velcro on both hands. This will make the elf easier to hang on things! (Be sure to use the different sides of velcro so they stick.) The velcro option is great…you can use it to have him display clever little notes! The possibilities are endless.
- Step 6: Get your magnets ready and cut velcro to size. Again, be sure to use opposite types of velcro. Also, ensure you are not using the sides of the magnets that stick together. I love the magnet option, because now he can “chill” on the refrigerator (get it? haha), but they’re still removable. That’s it! You’re done!

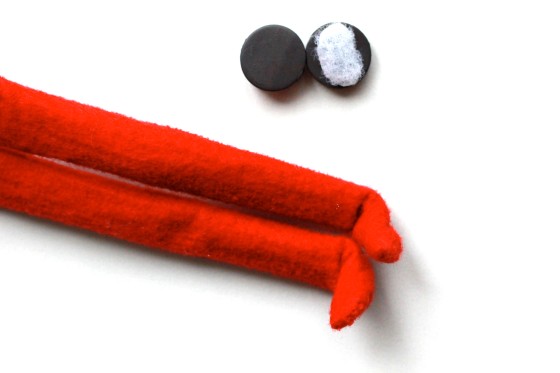
Now he has feet!
This project was super-simple. I have very little sewing experience, but I pulled it off just fine! Feel free to share with me if you do the project too, I can’t wait to see how yours will turn out! What a fun little tradition “Eddie” will be. =) Pin away, y’all! And be sure to “like” Life So Lovely on Facebook to receive updates of new posts in your newsfeed. ;) Oh, and I also did a pretty rad tutorial for a DIY Christmas Tree Preservative, or if you have younger kids check out my post on 10 Awesome Holiday Gift Ideas for Preschoolers/Kindergarteners.

That’s such a great idea! Thank you =)
Pingback: And then our dog ripped her tail off…well, just the tip. | Life So Lovely.
Pingback: DIY Christmas Tree Preservative | Life So Lovely.
Thanks!!! I knew it was possible!
Pingback: ‘Tis the Season to be…Jolly? | Life So Lovely.
i found you on pinterest. as soon as i read your tutorial i immediately called both my sisters and told them they had to check it out as we too were a little disappointed with the quality of our elves. one question about the wire… i have some but i have no idea what gauge it is. it is not that think, but seems like it should be thick enough. does the gauge really matter?
Hi Erin! No, I don’t think it matters exactly what gauge it is…I wound mine together because I didn’t think it would be strong enough (16 gauge was all I could find). If you want to, you could probably wind 3 pieces (instead of 2) together if you’re concerned it might be too thin! I hope it helps! Our Elf is a lot more fun nowadays. =)
I have been wanting to do this but wasn’t so sure how to go about it! Thanks for posting the tips!
I bought the wrong kind of wire last year… thanks for posting exactly what you used!
Oh my our Elf needs a surgery! He will get it tomorrow in his next trip to the North Pole! Love it!
Do you know where I can find the heads for elf on the shelf?
Barnes and Nobel
the head is a standard 2″ boy doll head. I was looking for the elf heads from the 6o’s, but they are hard to come by. I am able to find the boy heads quit easy. Most craft stores carry them. You can also use a santa head for “older elf on the shelf” Hope this helps.
Sorry Joanne, I don’t know of anywhere with *just* the heads available. I got my Elf at Target, but I don’t think the heads are sold separately…sorry I don’t know more! Google didn’t turn up anything either. Does anyone else know?
Maybe on the website they have replacement pieces? Thank you for the great idea!! I was so disappointed when I opened the box and he flopped out. YAY!
Do you place the magnets in the elf’s body? Wasn’t clear how you use them. Or you just velcro it to his body as needed? Probably that option right?
No, the magnets aren’t strong enough to hold through the felt…I attached velcro to the magnets so they could stick to the velcro already placed on the Elf’s hands…that way, it’s completely optional!
Thank you so much for posting this tutorial! I am trying to make my own Elve (3) and ordered doll forms but tey are way to0 large. (14″ and fatter) I am thinking I can make my own form after looking at how they are actually constructed. You mentioned a tube inside the arm, do you think it is a doll form underneath? Can you tell me what the measurements are for the Elf, legs, arms and total length? I want to make one for all 3 of my grown children so they can start this tradition with their families someday. I think they will have a blast playing with them when they come home for the Holidays. Back to the project, I also found doll faces on e-Bay and I am waiting for them to arrive and then I will get started. I am thinking that the faces may be too big, they stated they are 2 x 3 inches, no hair, so I will have to make hair with “sculpty clay” . Thanks for any information you can give me, you did a great job on your tutorial!
Hi Susan! Yes, I think it would be fairly easy to do oneself! His body is all felt, and I believe the tubes in the arm are a similar to a thick paper stock…they do allow some flexibility when they’re bent. His legs are approximately 5 inches, and I would say his arms are about 3-4 inches. Thanks for stopping by, and good luck on your elves!
Thanks for replying! I hate to bug you but what is the total length and face size? I will let you see the finished product and let you know how it goes! I will take some pics too! Have a Merry Christmas! I thank you again for your help!!!!!
there is now a snag-free Velcro
that would be perfect for this, both sides are the same so no worrying about getting a hook and a loop side
Pingback: So, I’m Officially an Active Duty Army Wife. | Life So Lovely.
I purchased an elf after chistmas hoping the bookstore would have them on sale no such luck :( a few of my daughters class mates use the elf. And after talking-to a few parents thought it may be fun. The doll was a disapointment given the price im going to do this to our doll before the Christmas season starts. Wish there was more selection in hair coloring my daughters a redheaded all the dolls ive seen are brunettes.